At a glance
- Emits
- linear.identifier, linear.url, linear.id
- Needs
- A Linear account connected in Settings, Integrations
Set it up
Connect a Linear workspace first — Settings, Integrations, a Linear personal API key; see Integrations. Then pick the destination and template the fields.
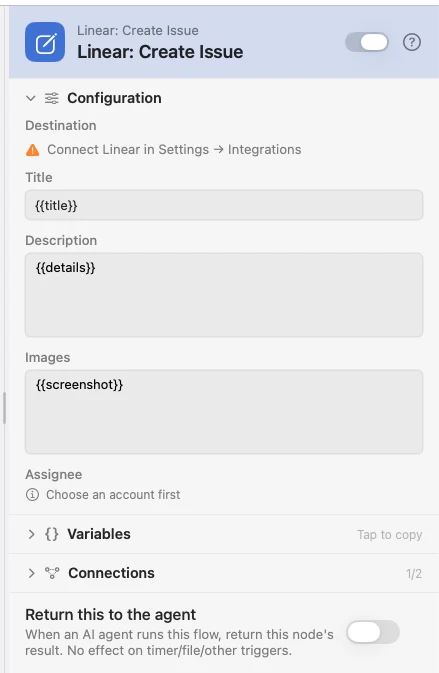
Configure
| Field | Default | What it does |
|---|---|---|
| Destination | — | Cascading Account, Team and Project rows from the connected workspace. The Account row hides itself when you have only one. |
| Project ID | — | The project UUID, to route it from upstream instead of picking. Supports {{var}}. |
| Title | — | The issue title. Supports {{var}}. |
| Description | — | The body, in Markdown. Supports {{var}}. |
| Images | — | Local image paths, comma- or newline-separated, uploaded and embedded in the body. {{filePath}} works here. |
| Assignee | — | A user from the connected account. |
New issues take the team's own defaults for priority, labels and status — this node exposes none of them.
Output
| Key | Type | Value |
|---|---|---|
linear.identifier | String | The readable id, e.g. WAT-123 |
linear.url | String | Web URL of the new issue |
linear.id | String | Linear's internal UUID — what Add Comment wants |
Example: file a bug from a screenshot
A hotkey opens a Form asking for a title and a screenshot, and the issue is filed with the image embedded.
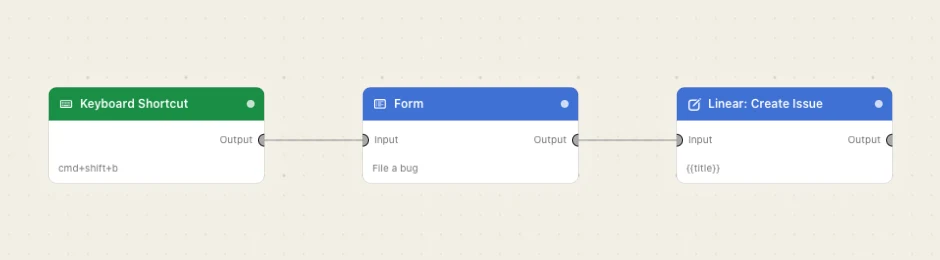
Paste this into the Flow Builder to get the same flow:
On a keyboard shortcut, show me a form with a title, a description and an image, then file it as a Linear issue with the image attached.
Good to know
{{linear.id}} is the handle to keep; {{linear.identifier}} is the one to put in a notification, because it is the one you can read.