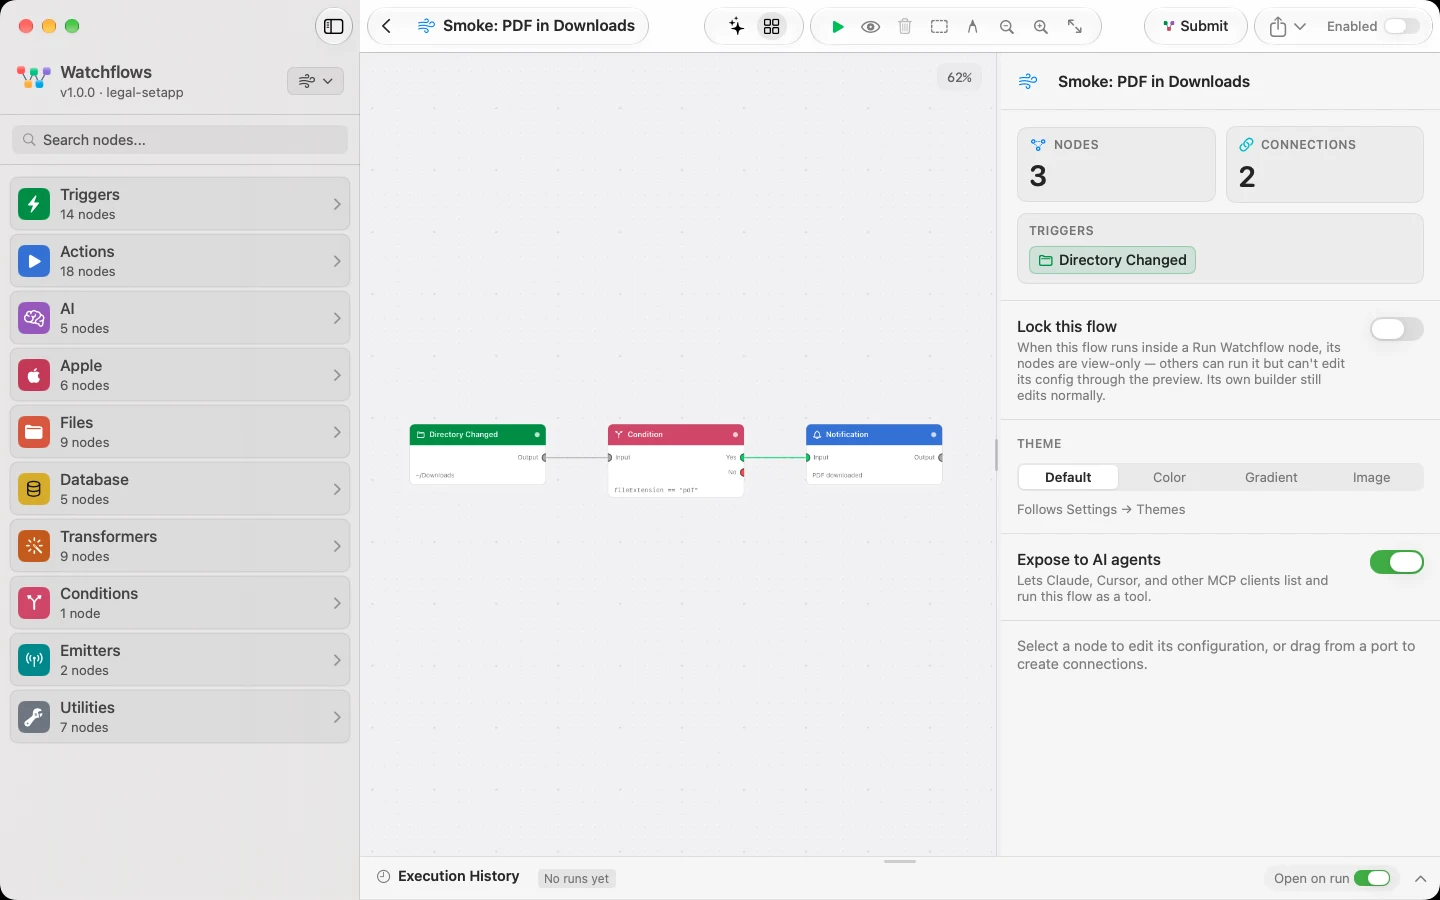
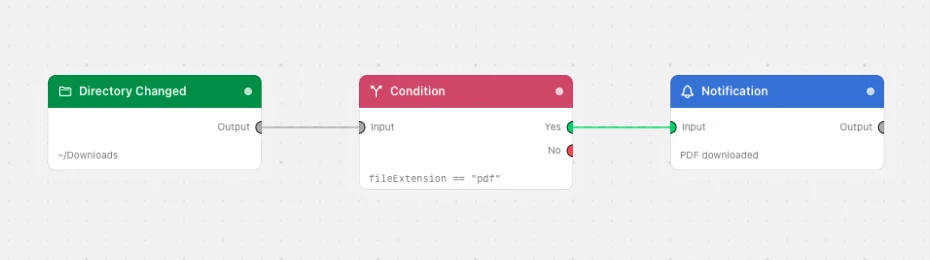
You will build this: the moment a PDF lands in ~/Downloads, a notification tells you its name. Nothing else fires. Every idea you need for bigger flows is in it — a trigger, a branch, a payload, and interpolation.
1. Make a flow
Click New Flow in the toolbar.
If you have set up AI, the new flow opens in the Flow Builder and asks What should Watchflows watch for? — describe the flow and it builds it. Click Start from scratch to build it by hand instead. With no provider set up you land on the empty canvas directly.
Either way you end up on a blank canvas with the node palette down the left.
2. Place the trigger
The palette opens on a card per category. Click Triggers to drill in — the header says what the category is for, and All categories takes you back. Or type in Search nodes... to find a node across every category at once.
Drag Directory Changed onto the canvas. Dragging is the only way to place a node; clicking a card does nothing.
Click the node on the canvas to select it. The inspector opens on the right:
- Directory — pick
~/Downloads. - Event Types — leave it on Created. A folder that fires on deleted too will chase its own tail once a downstream action moves files out of it.
- Watch Subdirectories and Wait for iCloud download can stay on.
3. Add the branch
Drag a Condition onto the canvas to the right of the trigger, then wire them: drag from the trigger's outlet — the dot on its right edge — to the Condition's inlet on its left. A wire appears. Data runs left to right along it.
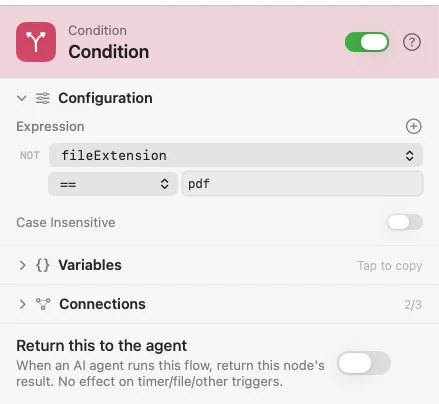
In the Condition's inspector add one rule: field fileExtension, operator Equals, value pdf.
fileExtension is not a name you have to remember. Directory Changed publishes it, along with filePath, fileName, directory, fileType, changeType and timestamp — every trigger and node lists what it emits on its own docs page, and the inspector offers upstream variables as you type.
4. Add the action
Drag a Notification onto the canvas. A Condition has two outlets — Yes (green) and No (red). Wire Yes to the Notification's inlet and leave No unconnected. A payload that leaves by an outlet with nothing wired to it stops there, and the Condition shakes to tell you it was a dead end.
In the Notification's inspector:
- Title —
PDF downloaded - Body —
{{fileName}} just landed in Downloads
{{fileName}} is interpolation. Anywhere a text field takes it, Watchflows swaps in the value the payload is carrying when the node runs. See Payloads for the whole story.
5. Run it, then arm it
Press Run (⌘R) in the toolbar to fire the flow by hand. Nodes and wires light up as the payload moves through them. Stop is ⌘. if you need it.
The Execution History drawer along the bottom is where you read the result: one row per node, with a green tick for finished, a red cross for failed, an orange mark for a dead end, a preview of what the node emitted, and how many milliseconds it took. Switch it from List to Waterfall to see where the time went.
When the run does what you wanted, flip Enabled in the top right. The flow's triggers are now armed: Watchflows watches ~/Downloads in the background whether or not this canvas is open. Turn Enabled off to stop it — you can still run it by hand.
A destructive flow asks first. Had you wired a Move File or Delete File instead of a Notification, arming it would have put up a confirmation. See Destructive Actions.
Where to go next
- Keep your library tidy — Folders & Favorites group flows and star the ones you reach for.
- Understand what is moving — Payloads, Port Types, and the Execution Model.
- Let the AI build it — Set Up AI gets you a working model, then the Flow Builder builds from a sentence.
- Browse everything you can place — the node reference.
The app links straight back here. Help ▸ Open Documentation (⇧⌘?) opens these docs, and the ? in any node's inspector opens that node's page.